DIY Handmade Headphone Cables: A Complete Step by Step Guide
- gsaudiocables
- Jun 20
- 4 min read
Updated: Jun 24
Creating custom handmade headphone cables can dramatically improve your audio experience. Whether you're an audiophile in search of pure sound quality or a DIY enthusiast wanting to make something special, building your own headphone cables offers both satisfaction and performance. This guide provides essential steps and materials to help you create your custom cables.
Understanding the Basics of Handmade Headphone Cables
Before you start crafting, it's important to know the key components of headphone cables. Typically, a headphone cable includes three main parts: the connector, the wires, and, for complex designs, extra components like resistors or switches.
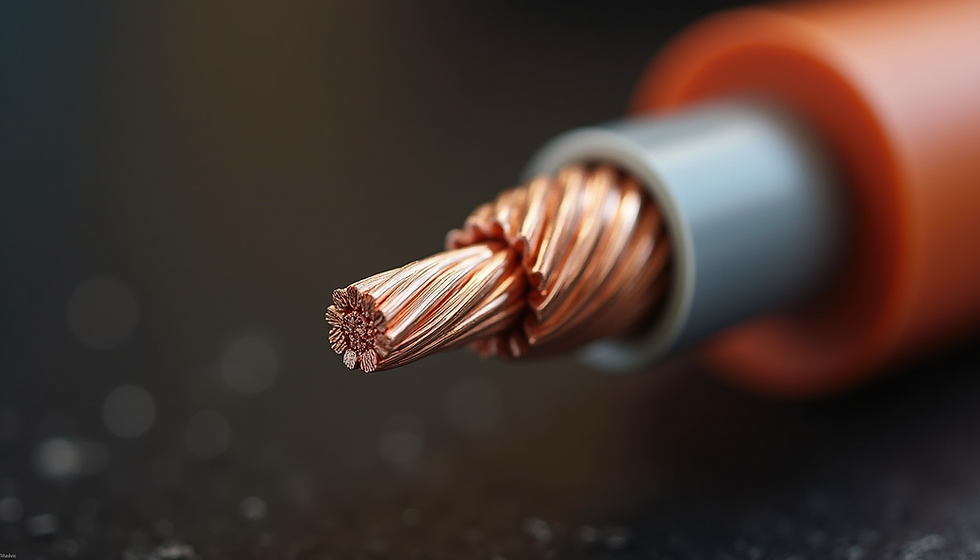
Headphone cables are typically made from copper or oxygen-free copper due to their excellent conductivity. The wire gauge can significantly affect sound quality, durability, and flexibility. For example, a 24-gauge wire, being thicker, is noted for its strength, whereas a 26-gauge wire provides more flexibility. OCC Copper, produced through Ohno Continuous Casting, is a superior alternative to oxygen-free copper. Other materials to consider for headphone cables include silver-plated OCC Copper or Pure Silver cables. For a high-end option, you might look into Gold Silver Graphene Palladium cables. Understanding the characteristics of these materials can enhance your audio experience.

Materials You Will Need
Here are the essential materials for your project:
Wires: Choose either 24 or 26-gauge copper, silver, or hybrid wire.
It's important to have a reliable source. Be cautious, as many sources market Oxygen-Free Copper cables as OCC Copper.
Connectors: Choose the right connectors (3.5mm, 1/4 inch, or 4-pin XLR) that are compatible with your headphones and audio source. The material of the connectors is crucial. Tellurium copper rhodium or gold-plated connectors are a good choice, while Oxygen-Free Copper or pure silver connectors are high-end options. Purchase connectors from a reputable brand.
Heat Shrink Tubing: Utilize this for safeguarding joints and ensuring a neat finish. Opt for the version with adhesive inside, as it will provide longer-lasting protection.
Solder and Soldering Iron: Crucial for joining wires and connectors. Low-temperature silver solder is one of the best options for soldering. Despite its high cost, it is valuable as it improves sound quality. A soldering station is preferable to a soldering iron because it offers adjustable temperature settings, which is important since each type of cable requires a different soldering temperature.
Shielding: Your cable could function as an antenna, capturing external noise. Installing a shielding net can assist in reducing EMI - electromagnetic interference. Tinned copper is a suitable choice as it resists oxidation over time. Remember, do not use the shielding net as a conductor.
Sleeving: A cable sleeve serves both as an aesthetic component and a protective layer for your cable. Opt for a nylon cable sleeve for enhanced flexibility and durability.
Multimeter: To test continuity and avoid shorts.
Tools: Wire strippers, scissors, and a heat gun.
Organizing your materials can greatly streamline the building process.
Step-by-Step Instructions to Build Handmade Headphone Cables
Step 1: Preparing the Wires
Start by cutting a piece of wire that is longer than you think you'll need, usually between 5 and 10 feet, to allow for any adjustments. Use wire strippers to remove about 1/4 inch of insulation from each end of the wire. If the wire is multi-stranded, be careful not to cut any strands, as this can affect sound quality. Some wires have a protective coating that should be removed before soldering for optimal results.
Step 2: Attaching the Connectors
Adjust the soldering station's temperature according to the type of cable and solder you are using, then carefully solder the wires to the connectors. Use specific wiring diagrams relevant to the connectors you are working with. Since most connectors have distinct configurations, consult your device's manual or trustworthy online resources for guidance.
Step 3: Insulating the Joints
After soldering, slide heat shrink tubing over the solder joints. Use a heat gun or lighter to shrink the tubing. This step protects your solder joints and increases the cable's longevity.

Step 4: Testing the Cable
Before completing your cable, ensure it functions correctly. Use a multimeter to check continuity along each wire, confirming solid connections and that there are no shorts between strands.
Step 5: Final Assembly
Once tested, wrap the cable in a protective sleeve for added aesthetics and durability. This not only enhances the appearance but also helps minimize cable noise. Make sure all parts are secure to prevent any loose connections.
Tips for Enhancing Your Handmade Headphone Cable
Transform your headphone cable into an exceptional piece by focusing on the small details:
Experiment with Wire Types: Different materials, such as silver-plated copper, can enhance the sound quality. Studies have shown that cables using higher-quality materials might improve audio clarity by as much as 30%.
Add a Y-Splitter: If your headphones have a single input, a Y-splitter can provide versatility, allowing the use of the cable with multiple devices.
Use a Braiding Technique: Braiding wires together achieves a visually appealing look and helps prevent tangling. A study has shown that braided cables may reduce external noise interference by around 15% compared to non-braided ones.
Troubleshooting Common Issues
Even experienced builders can face challenges. If you notice sound quality issues, double-check connections and ensure no wires are crossed. If sound is coming from only one side, verify that the wiring to the connector is correct and that soldered connections are secure.

Final Thoughts
Building your own custom headphone cables is not just an enjoyable DIY project; it allows for complete personalization of your audio system. With the right materials and attention to detail, you can create high-quality cables that enhance your listening experience.
Start this rewarding hobby and embrace the joy of crafting something designed specifically for you. As you gain confidence, feel free to experiment with different materials and designs to discover the perfect match for your audio preferences. Your ears will surely thank you!


Comments